How to Check Transmission Fluid in a Manual Transmission

To check the transmission fluid in a manual transmission, locate the filler plug on the bottom of the transmission. Jack up the vehicle and secure it with jack stands. Remove the plug using a wrench and check the fluid level by inserting your finger or a tool. Ensure the fluid is clear and reaches the filler hole. If low, add the recommended fluid type, found in your owner’s manual, and reattach the plug. Always clean up spills and check for leaks.
Understanding the Importance of Transmission Fluid
Transmission fluid plays a critical role in the smooth operation of a manual transmission. It lubricates the gears, bearings, and other moving components, preventing excessive wear and overheating. Additionally, it helps cool the transmission and ensures proper clutch engagement. Without sufficient fluid, the transmission can overheat, leading to premature wear and potentially costly repairs. Regular checks are essential to maintain optimal fluid levels and prevent damage. The fluid also acts as a hydraulic medium, enabling smooth gear shifts and synchronizer operation. Over time, transmission fluid can degrade or leak, reducing its effectiveness. Recognizing the importance of transmission fluid ensures you prioritize its maintenance, helping to extend the lifespan of your vehicle’s transmission and maintaining its performance. Always use the correct type of fluid specified by your vehicle’s manufacturer to ensure compatibility and proper function. Neglecting transmission fluid can lead to rough shifting, noise, and eventual system failure, making it a vital component of routine car maintenance.

Preparing Your Vehicle for the Check
Before checking the transmission fluid in a manual transmission, ensure your vehicle is properly prepared. Start by driving the car for a few minutes to warm up the engine, as this helps the fluid circulate and provides an accurate level reading. Find a level surface to park on, as uneven ground can affect the fluid level measurement. Engage the parking brake and shift the transmission into neutral to ensure the vehicle remains stationary during the process. If necessary, use jack stands to lift the car and gain access to the underside, ensuring it is securely supported. Refer to your owner’s manual to locate the transmission fill and drain plugs, as their positions vary by vehicle. Gather the tools you’ll need, such as a socket wrench and a rag, and ensure you have the correct type of transmission fluid on hand. Proper preparation ensures safety and accuracy when checking the fluid level.
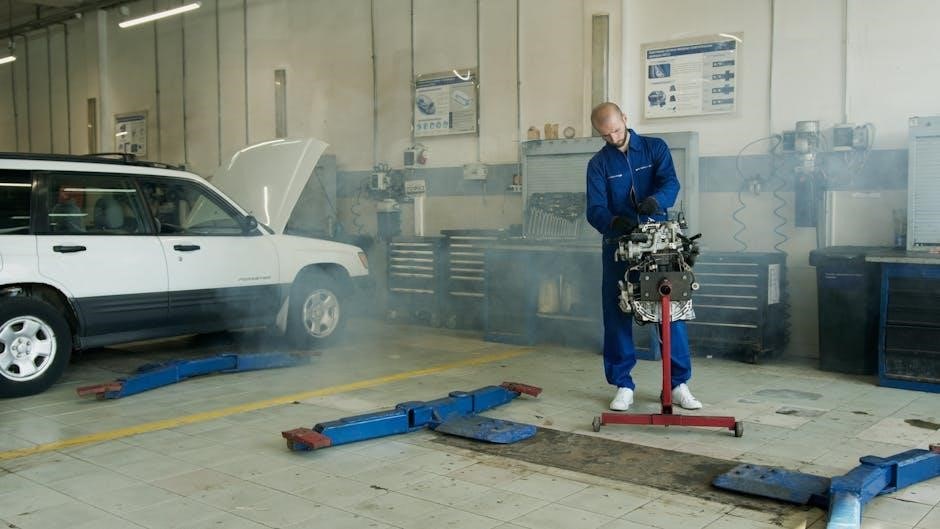
Locating the Transmission Fluid Plug
Locating the transmission fluid plug on a manual transmission is crucial for checking the fluid level. Since manual transmissions typically lack a dipstick, the fluid plug is usually found on the bottom or side of the transmission. Refer to your owner’s manual for specific guidance, as its position can vary by vehicle make and model. Often, it is situated near the front of the transmission, closer to the engine, and may be on either the driver’s or passenger side. To access it, you’ll need to lift the car using a jack and secure it with jack stands. Once underneath, look for a plug that is slightly larger than a quarter. Use a wrench or socket to remove it. Ensure the area around the plug is clean before removal to prevent contamination. If you’re unsure, consult the manual or seek visual guides online to accurately identify the plug’s location. Proper identification ensures you can safely and effectively check and maintain your transmission fluid.
Jacking Up the Vehicle for Access

Jacking up the vehicle is essential to access the transmission fluid plug on a manual transmission. Begin by ensuring the car is parked on level ground to maintain stability. Engage the parking brake and place wheel chocks around the rear wheels for added safety. Locate the jacking points on the vehicle, which are typically metal reinforcements near the front wheels. Position a hydraulic floor jack under the jacking point and slowly raise the vehicle until the underside is accessible. Once raised, secure the vehicle with jack stands to prevent the jack from slipping. Ensure the vehicle is stable and sturdy before attempting to work underneath it. Always refer to your owner’s manual for specific jacking instructions, as the location of jacking points can vary by vehicle make and model. Never rely solely on the jack; always use jack stands for safety. Make sure the vehicle is high enough to allow easy access to the transmission fluid plug, but not so high that it becomes unstable. This step ensures you can safely and effectively perform the next steps in checking the transmission fluid.
Removing the Filler Plug
Position yourself under the vehicle once it is securely raised on jack stands. Locate the filler plug on the side of the manual transmission, typically on the driver’s side near the bottom. Use a wrench or socket to remove the plug by turning it counterclockwise. Be prepared for any residual fluid to drip out. Inspect the area around the plug for debris or obstructions and clean it if necessary. To check the fluid level, insert your finger or a metal stem into the filler hole. The fluid level should be just below the opening of the filler plug. Ensure the fluid is clear and at the appropriate level. If the fluid is low, refer to your owner’s manual to identify the correct type of transmission fluid to add. After checking or adding fluid, replace the filler plug by turning it clockwise until it is securely tightened. Double-check the plug to ensure it is not leaking. Always handle the filler plug with care to avoid stripping the threads. Wear protective gloves and eyewear to safeguard against any potential spills or debris.
Checking the Fluid Level
In a manual transmission, there is no dipstick, so you’ll need to check the fluid level directly through the filler plug. Once the plug is removed, insert your finger or a clean tool (like a metal stem) into the filler hole to gauge the fluid level. The fluid should be just below the opening of the filler plug. If the fluid level is low, you’ll need to add the appropriate type of transmission fluid, as specified in your owner’s manual. Ensure the fluid is clear and free of debris. If it appears dark, gritty, or has a burnt smell, it may need to be changed entirely. Always refer to your manual for the correct fluid capacity and type. After checking, replace the filler plug securely to avoid leaks. If you added fluid, repeat the process to confirm the level is accurate. This step ensures your manual transmission operates smoothly and prevents potential damage from low fluid levels.
Interpreting the Fluid Condition
After accessing the fluid, inspect its condition to ensure it is in good shape. Healthy transmission fluid should appear pink or red and be clear. If the fluid looks dark, murky, or has a burnt smell, it may be degraded and in need of replacement. Check for any visible particles or debris, as contamination can damage the transmission. If the fluid feels gritty or thick when touched, it could indicate worn components or internal damage. A milky appearance may suggest water contamination, which requires immediate attention to prevent corrosion. If the fluid level is consistently low despite adding fluid, it could indicate a leak in the system. Always refer to your owner’s manual for guidance on the correct fluid type and condition. If you notice any of these issues, consider consulting a mechanic to avoid further damage. Regular fluid checks and maintenance can extend the life of your manual transmission and ensure smooth operation.
Adding Transmission Fluid if Necessary
After determining the fluid level is low, ensure you have the correct type of transmission fluid specified for your manual transmission. Unlike automatic transmissions, manual transmissions typically require a thicker fluid, so consult your owner’s manual for the appropriate specification. Use a small funnel or pump to gently pour the fluid into the filler plug opening. Be cautious not to overfill, as this can lead to leaks or other issues. Replace the filler plug securely once the fluid reaches the recommended level. To ensure proper circulation, take the vehicle for a short drive and monitor for any signs of leaks around the filler plug area. If you encounter any difficulties or notice persistent low fluid levels, it may be wise to consult a professional mechanic to check for potential leaks or internal damage. Always prioritize using the correct fluid type and proper filling technique to maintain the health and longevity of your manual transmission.

Replacing the Filler Plug
Once the fluid level is confirmed to be correct, carefully replace the filler plug to prevent dirt or debris from entering the transmission. Tighten the plug securely using a wrench, ensuring it is snug but not over-torqued, as this could damage the threads. Double-check the plug for any signs of leaks by inspecting the area around the plug for fluid droplets or seepage. If the plug appears damaged or worn, replace it with a new one to maintain the integrity of the transmission system. After replacing the filler plug, lower the vehicle from the jack stands and ensure it is resting firmly on the ground before driving. Finally, clean any tools or surfaces that may have come into contact with transmission fluid to maintain a tidy workspace. Properly replacing the filler plug is essential to safeguard the transmission from contamination and ensure optimal performance.
Lowering the Vehicle
Once you have completed the transmission fluid check and replaced the filler plug, it is time to lower the vehicle safely. Begin by ensuring the area around the vehicle is clear of tools and obstacles. Slowly lower the vehicle using a hydraulic floor jack, taking care not to rush the process. As the vehicle descends, maintain control to prevent any sudden movements. Once the vehicle is back on the ground, remove the jack stands and store them securely. Double-check that the vehicle is stable and resting evenly on all four wheels. Before driving, inspect the area around the transmission for any signs of leaks or fluid drips. Ensure all tools are cleared from underneath the vehicle to avoid damage or tripping hazards. Lowering the vehicle properly ensures safety and prevents potential damage to the transmission or undercarriage. Always prioritize caution when working with jacks and jack stands to avoid accidents.

Cleaning Up
Cleaning up after checking the transmission fluid is crucial to maintain a safe and organized workspace. Start by inspecting the area for any spills or drips. Use rags or paper towels to absorb any fresh transmission fluid, ensuring not to spread it further. For stubborn stains, apply a solvent to dissolve the residue before wiping it clean. Dispose of soiled rags and materials responsibly, adhering to local regulations for hazardous waste. Clean your tools with a solvent and dry them thoroughly to prevent rust. Store all tools securely to maintain their condition. Finally, ensure no tools or rags are left under the vehicle to avoid potential hazards. Proper cleanup prevents environmental contamination and keeps your workspace tidy for future maintenance tasks.
Consulting Your Owner’s Manual

Consulting your owner’s manual is essential before and after checking the transmission fluid in your manual transmission. The manual provides specific guidance tailored to your vehicle, including the correct fluid type, capacity, and the proper procedure for checking the fluid level. It also details the location of the filler plug, which can vary depending on the make and model of your car. Refer to the manual to understand the recommended fluid viscosity and any special instructions for your vehicle. Additionally, the manual may include troubleshooting tips if you notice issues during the fluid check, such as low levels or discolored fluid. Always follow the manufacturer’s recommendations to ensure the longevity and performance of your transmission. If the manual is unclear or you’re unsure about any step, consider consulting a professional mechanic to avoid potential damage. Regularly reviewing the manual helps you stay informed about maintenance needs and prevents costly repairs down the road.
Recognizing Signs of Low Transmission Fluid

Recognizing signs of low transmission fluid is crucial for maintaining your manual transmission’s health. Common indicators include difficulty shifting gears, grinding noises during gear changes, or a delay in acceleration. If the fluid level is too low, the transmission may slip or hesitate, especially when accelerating from a standstill. You might also notice a burning smell, which indicates overheated components due to insufficient lubrication. Additionally, if the fluid level is consistently low despite regular checks, it may signal a leak in the system. Addressing these issues promptly can prevent costly repairs. Always refer to your owner’s manual for specific guidance on identifying and resolving low transmission fluid symptoms in your vehicle. Regular monitoring and timely intervention ensure optimal performance and longevity of your car’s transmission system.