This manual guides the installation, operation, and maintenance of the Chamberlain RJO101 wall mount Wi-Fi garage door opener, designed for residential sectional doors with torsion assemblies. It ensures safe and proper setup, providing detailed instructions and troubleshooting tips for optimal performance. Use 3D instructions from BILT for easy installation.
1.1 Overview of the Chamberlain RJO101 Garage Door Opener
The Chamberlain RJO101 is a wall-mount Wi-Fi garage door opener designed for residential sectional doors with torsion assemblies. It offers a space-saving design, quiet operation, and smart home compatibility. Ideal for standard sectional doors up to 14 feet high, it requires professional installation and may need adjustments to door springs or tracks for proper function.
1.2 Importance of Proper Installation
Proper installation of the RJO101 is critical for safety, functionality, and warranty validity. Incorrect installation can lead to hazards, malfunction, or void the warranty. Ensure all safety materials and guidelines are followed, and consider hiring a trained technician for precise setup and adjustments to door springs or track configurations as needed.

System Requirements and Compatibility
The RJO101 is compatible with standard residential sectional doors up to 14 feet high, requiring a 120 VAC/60 Hz outlet. Ensure a qualified electrician installs the outlet if needed. Check bridge.chamberlain.com to verify if a bridge is required for HomeLink compatibility.
2.1 Voltage and Power Requirements
The RJO101 requires a 120 VAC/60 Hz power supply. Ensure the outlet is installed by a qualified electrician if not already available. This voltage specification is crucial for proper operation.
2.2 Compatibility with Residential Sectional Doors
The RJO101 is designed for residential sectional doors with torsion assemblies, accommodating standard sizes up to 14 feet high. Ensure compatibility with your door type, as it is not suitable for low headroom tracks with outside pickup drums. Proper alignment and door spring adjustments may be required for optimal performance.
2.3 Need for a Bridge for HomeLink Compatibility
For HomeLink compatibility, a Bridge may be required. Visit bridge.chamberlain.com to verify if a Bridge is needed for your specific setup. This ensures seamless communication between the RJO101 opener and HomeLink systems, guaranteeing proper functionality and integration without additional programming complications.
Pre-Installation Preparation
Survey the installation area, noting drum sizes and door dimensions. Ensure a properly installed 120 VAC/60 Hz outlet. Measure and verify space requirements for the opener.
3.1 Surveying the Installation Area
3.2 Measuring Drum Sizes and Door Dimensions
Measure the garage door height, typically up to 14 feet, and verify the drum size compatibility with the RJO101 opener. Ensure the door dimensions align with the opener’s specifications for proper fitment. Accurate measurements are crucial for safe and correct installation, preventing potential issues with door operation and opener performance. Always double-check your measurements for accuracy.
3.3 Ensuring Proper Outlet Installation
The RJO101 requires a dedicated 120 VAC/60 Hz outlet. Ensure the outlet is correctly installed and meets these specifications. If not already present, consult a qualified electrician to install the outlet. Proper electrical installation is crucial for safe and efficient operation of the garage door opener.

Safety Precautions and Warnings
Adhere to all safety guidelines to prevent accidents. The Protector System must be connected for safe operation. Read the manual and enclosed safety materials carefully before starting installation.
4.1 Importance of the Protector System
The Protector System is crucial for safety, preventing accidents by detecting obstacles. Ensure it is properly connected and functioning. The garage door will not close unless the system is operational, protecting people and objects from potential harm during operation.
4.2 Safety Materials and Guidelines
Read all safety materials carefully before installation. Ensure proper setup by trained technicians to avoid risks. Attach warning labels as indicated. Follow guidelines to prevent accidents and ensure compliance with safety standards. Proper installation and adherence to instructions are critical for safe and reliable operation of the RJO101 opener.
4.3 Periodic Checks for Safe Operation
Regular maintenance is essential to ensure the RJO101 operates safely. Check sensors, cables, and springs for wear or damage. Verify the Protector System is functioning correctly. Refer to the manual for detailed inspection procedures to maintain optimal performance and safety standards over time.

Step-by-Step Installation Process
This section provides a detailed, step-by-step guide for installing the RJO101, including mounting the opener, wiring, and testing. Use BILT’s 3D instructions for clarity.
5.1 Mounting the Opener on the Wall
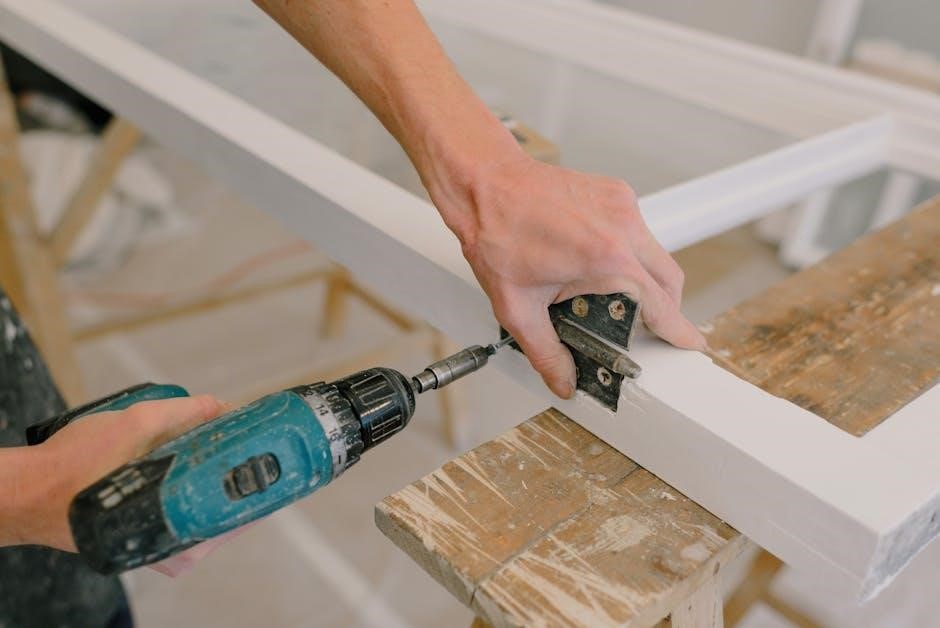
Mount the RJO101 opener securely on the wall near the garage door, ensuring proper alignment and level placement. Attach the mounting brackets to wall studs for stability, then hang the opener and tighten firmly. Connect the opener to the door’s torsion spring system, following the manual’s instructions for correct cable tension and safety. Test the opener after installation to ensure smooth operation.
5.2 Wiring and Electrical Connections
Connect the RJO101 opener to a dedicated 120 VAC/60 Hz outlet. Ensure the outlet is properly installed and rated for the opener’s power requirements. Carefully follow the wiring diagram in the manual, connecting all necessary wires securely. Turn off power before making connections to avoid electrical hazards. After wiring, test the opener to confirm proper operation and safety.
5.3 Testing the Opener After Installation
After installation, test the opener by cycling the door open and closed to ensure smooth operation. Check that the door stops correctly at set limits and the safety features function properly. Verify remote and wall button functionality. Ensure all lights and indicators operate as described in the manual for proper performance and safety.

Programming the Garage Door Opener
This section covers setting travel limits, programming remote controls, and understanding LED indications. Ensure all safety features function correctly and follow manual instructions for optimal performance.
6.1 Setting Travel Limits
Setting travel limits ensures the garage door opens and closes fully. Adjust the opener to match your door size, ensuring smooth operation and preventing collisions. Follow manual guidelines for precise adjustments and safe functionality, using the provided instructions to achieve optimal door movement and alignment.
6.2 Programming Remote Controls
Program your remote by syncing it with the opener using the learn button. Follow manual instructions to set travel limits and ensure proper synchronization. Check the CTM Learn setting and LED indicators for confirmation. Use BILT 3D instructions for visual guidance and troubleshooting tips to avoid programming timeouts during setup.
6.3 Understanding LED Indications
The LED on your RJO101 indicates operational status and errors. Flashing patterns signal issues like sensor alignment or connectivity problems. Refer to the manual for specific codes, such as lights flashing five times for programming timeouts. Use the BILT 3D guide or online resources for troubleshooting and resolving LED-related issues efficiently.

Troubleshooting Common Issues
This section addresses frequent problems, such as sensor alignment, cable tension, and programming timeouts. Use LED indicators and BILT 3D guides for diagnosing and resolving issues effectively.
7.1 Resolving Sensor Alignment Problems
Sensor misalignment can prevent proper door operation. Check LED indicators for error codes. Ensure sensors are clean, securely mounted, and aligned properly. Consult BILT 3D instructions for visual guidance. Verify connections and refer to troubleshooting sections for detailed alignment procedures to restore functionality.
7.2 Fixing Cable Tension Issues
Ensure proper cable tension by checking for slack or over-tightening. Use the learn button on the motor unit to reset tension. Refer to BILT 3D instructions for visual alignment guidance. Adjust cables carefully to avoid door misalignment or unsafe operation. Proper tension ensures smooth and reliable garage door functionality.
7.3 Addressing Programming Timeouts
If programming times out, ensure the Protector System is connected and functioning. Check for proper alignment and connection of sensors. Reset the opener using the learn button on the motor unit. Refer to the troubleshooting section for detailed guidance to resolve timeout issues effectively.

Additional Features and Accessories
Explore optional accessories like remote LED lighting, battery backup, and universal remotes to enhance functionality. These features provide convenience, improved visibility, and reliable operation during power outages.
8.1 Remote LED Lighting Options
The RJO101 supports up to eight LED light pods, providing comprehensive garage illumination. These energy-efficient lights offer bright coverage, enhancing safety and convenience. They can be easily installed and integrated with the opener for seamless operation, ensuring your garage is well-lit with minimal effort.
8.2 Battery Backup Functionality
The RJO101 features a battery backup system, ensuring operation during power outages. This reliable solution provides uninterrupted access to your garage, offering peace of mind and convenience. The energy-efficient design enhances performance while maintaining safety standards, making it a valuable addition to your garage door opener setup.
8;3 Available Remote Controls and Accessories
The RJO101 supports various remote controls, including universal 3-button remotes and keyless entry systems, enhancing convenience and security. Additional accessories like LED lighting kits and battery backup systems are available, ensuring seamless integration and optimal performance. These accessories are designed to enhance functionality while maintaining compatibility with the opener’s advanced features.

Maintenance and Upkeep Tips
Regular maintenance ensures reliable performance. Lubricate moving parts annually, inspect and replace worn components, and update firmware for optimal functionality and safety. Refer to the manual for specific guidance.
9.1 Regular Lubrication of Moving Parts
Regular lubrication is essential for smooth operation. Apply a silicone-based lubricant to all moving parts, such as rollers and hinges, annually. This prevents wear and tear, ensuring quiet and efficient door movement. Refer to the manual for specific lubrication points and recommendations to maintain optimal performance and extend equipment lifespan. Always use compatible products.
9.2 Inspecting and Replacing Worn Components
Inspect rollers, hinges, and cables every 3-6 months for wear. Replace damaged or frayed components promptly to ensure smooth operation and safety. Use genuine Chamberlain parts for compatibility and performance. If unsure, consult a qualified technician to avoid further damage or potential hazards. Regular inspections prevent unexpected malfunctions and extend system lifespan. Always follow manual guidelines.
9.3 Updating Firmware for Optimal Performance
Regularly update the RJO101 firmware via the Chamberlain app or website to ensure optimal functionality. A stable Wi-Fi connection is required during updates. Install only genuine Chamberlain firmware to maintain security and performance. Updates often include feature enhancements, bug fixes, and improved compatibility. Always follow the manual’s instructions for a smooth updating process.
Warranty and Support Information
Chamberlain offers comprehensive warranty coverage for the RJO101. Contact support via phone or online for assistance. Visit the official website for detailed warranty terms, FAQs, and downloadable resources to ensure your opener operates under warranty conditions. Proper installation by trained technicians is recommended to maintain warranty validity.
10.1 Understanding the Warranty Coverage
The Chamberlain RJO101 warranty covers parts and labor for a specified period, ensuring protection against defects. Proper installation by trained technicians is required to maintain validity. Visit Chamberlain’s official website for detailed warranty terms and conditions to understand what is covered and for how long.
10.2 Contacting Chamberlain Support
Chamberlain provides dedicated customer support for the RJO101 model. Visit their official website for contact details, including phone numbers and support portals. For assistance with installation or troubleshooting, reach out to their team, available to address your queries and ensure a smooth experience with your garage door opener.
10.3 Accessing Online Resources and Manuals
Visit the official Chamberlain website to access comprehensive online resources, including the RJO101 manual, troubleshooting guides, and installation instructions. Utilize BILT Intelligent Instructions for 3D installation support. Additionally, download PDF manuals or explore video tutorials for a seamless setup and maintenance experience tailored to your garage door opener model.
Using 3D Instructions for Installation
The RJO101 installation manual offers 3D instructions via BILT Intelligent Instructions, providing a visual and interactive guide for easy installation. This feature ensures accurate and efficient setup.
11.1 Benefits of BILT Intelligent Instructions
BILT Intelligent Instructions provide 3D, interactive guides for the RJO101 installation, offering visual step-by-step walkthroughs. This enhances accuracy, reduces complexity, and allows real-time troubleshooting, ensuring a smoother and more efficient installation process for users of all skill levels.
11.2 Navigating the 3D Installation Guide
The BILT 3D guide offers an interactive, step-by-step installation experience. Users can zoom, rotate, and explore each component visually, ensuring precise assembly. This tool simplifies complex steps, providing a clear visual context that reduces confusion and helps users complete the installation accurately and efficiently.
11.3 Troubleshooting with Visual Aids
The BILT 3D guide offers interactive visuals to help troubleshoot issues during installation. Users can zoom in, rotate views, and identify parts easily, ensuring proper alignment and connections. Visual aids provide real-time guidance, making it simpler to resolve common problems like sensor misalignment or cable tension adjustments efficiently.
Verify proper installation, ensure safety features function, and confirm all components operate smoothly. Final checks ensure reliability and safety, allowing you to enjoy the RJO101’s benefits fully.
12.1 Verifying Proper Installation
Ensure all components are securely fastened and aligned. Test the opener’s operation, checking smooth movement and correct door positioning. Confirm sensor alignment and verify that all electrical connections are safe and functional. Proper installation ensures reliable performance and longevity of the RJO101 garage door opener system.
12.2 Final Safety Checks
Review all safety guidelines and ensure the Protector System is functioning correctly. Test the opener’s safety features and verify sensor alignment. Check for proper electrical connections and ensure no loose components. Confirm all moving parts operate smoothly and quietly, adhering to safety standards for reliable and hazard-free operation.
12.3 Enjoying the Benefits of the RJO101 Opener
The RJO101 offers a space-saving design, freeing up ceiling space while providing ultra-quiet operation. With features like LED lighting and battery backup, it enhances convenience and security. Its Wi-Fi connectivity enables smart control, and energy-efficient performance ensures reliability. Enjoy seamless garage door operation with advanced technology designed for modern homes.