The Singer Sewing Company, founded in 1851 by Isaac Merritt Singer, revolutionized sewing with its innovative machines. Known for durability and versatility, Singer machines became indispensable in homes worldwide. The Singer 66 model, introduced in the early 20th century, stands out for its reliability and timeless appeal, making it a favorite among sewists.
Historical Background of the Singer 66
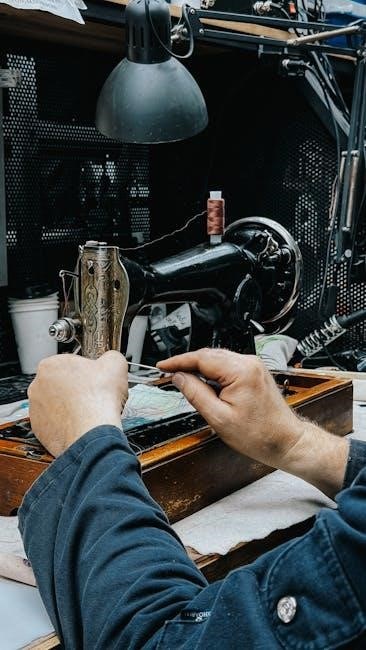
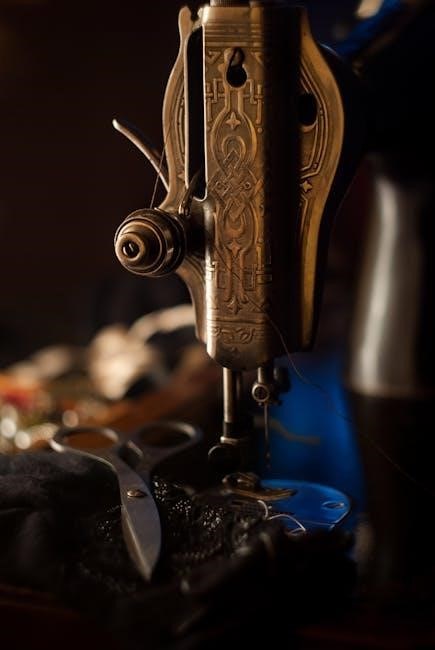
The Singer 66 sewing machine, introduced in the early 20th century, became a cornerstone of home sewing due to its durability and versatility. Known as the “Iron Lady” for its robust construction, it was widely used during the post-war era, particularly in Australian households, where it played a vital role in crafting clothing and home goods. The machine’s treadle operation made it accessible in areas without electricity, while its simple yet efficient design ensured consistent performance. Over the years, the Singer 66 gained a reputation for reliability, with many machines still functional today after decades of use. Its historical significance lies in its role as a workhorse for generations of sewists, offering a practical solution for both everyday and creative projects. The Singer 66’s enduring popularity has also made it a sought-after collector’s item, with enthusiasts restoring and preserving these machines to maintain their legacy in the world of sewing.

Overview of the Singer 66 Manual
The Singer 66 manual is a comprehensive guide designed to help users operate and maintain their sewing machine effectively. Available for various models such as the 66-1, 66-16, and 66-18, the manual provides detailed instructions for setup, threading, and basic stitching. It also covers maintenance routines, troubleshooting common issues, and the use of attachments and accessories. The manual is typically 64 to 72 pages long, featuring clear illustrations and step-by-step instructions to ensure ease of understanding. Many original manuals are still in good condition, with some dating back to the 1940s and 1950s. They often include tips for optimal performance and emphasize the importance of proper care to extend the machine’s lifespan. The Singer 66 manual is a valuable resource for both vintage sewing enthusiasts and modern users, offering practical advice and technical insights to maximize the machine’s capabilities. Its availability in digital formats has made it accessible to a wider audience, ensuring the legacy of the Singer 66 endures.
Models and Variations
The Singer 66 sewing machine is available in several models, including the 66-1, 66-16, and 66-18. Each model has its own manual, such as the 66-1 manual (Form K1783) and the 66-18 manual (Form 19800 Rev 146), detailing specific features and operations.
- The 66-1 model is known for its simplicity and durability.
- The 66-16 and 66-18 models offer additional features and attachments.
- All models emphasize ease of use and maintenance.
4.1 Singer 66-1
The Singer 66-1 is a highly sought-after model of the Singer 66 series, known for its reliability and simplicity. This model is particularly popular among sewing enthusiasts and collectors due to its durability and ease of use. The Singer 66-1 manual, often referred to as Form K1783, provides detailed instructions for setting up and operating the machine. It covers essential functions such as threading, bobbin setup, and basic stitching. The manual also includes troubleshooting tips and maintenance advice to ensure the machine runs smoothly. The Singer 66-1 is a treadle sewing machine, making it a favorite for those who prefer a non-electric, hands-on sewing experience. Its timeless design and robust construction have made it a staple in many home sewing rooms. The manual emphasizes the importance of proper care and regular maintenance to extend the machine’s lifespan. With its clear instructions and user-friendly approach, the Singer 66-1 remains a beloved choice for both beginners and experienced sewists.
4.2 Singer 66-16
The Singer 66-16 is another popular variation of the Singer 66 series, offering a blend of traditional design and practical features. This model is well-documented in its original manual, which provides comprehensive guidance for users. The manual, last copyrighted in 1950 under Form 20289 Rev 952, is in good vintage condition, with all pages intact and legible. It covers the general maintenance of the machine and includes instructions for using basic attachments, making it a valuable resource for both novice and experienced sewists. The Singer 66-16 is known for its durability and ease of operation, making it a favorite among those who appreciate classic sewing machines. The manual’s clear instructions and detailed illustrations ensure that users can troubleshoot common issues and perform routine maintenance with confidence. Whether for everyday sewing or restoration projects, the Singer 66-16 remains a reliable and versatile choice, supported by its well-preserved instructional guide.
4.3 Singer 66-18
The Singer 66-18 is a notable model in the Singer 66 series, known for its robust construction and user-friendly design. This model is particularly favored by collectors and sewists who appreciate its mechanical reliability and classic appeal. The original instruction manual for the Singer 66-18, last copyrighted in 1941 under Form 19800 Rev 146, provides detailed guidance for operating and maintaining the machine. Despite being in vintage condition, the manual remains in good shape, with all pages present and secure, ensuring that users can easily follow its instructions. The Singer 66-18 is celebrated for its simplicity and effectiveness, making it a popular choice for both everyday sewing and restoration projects. Its design emphasizes ease of use, with clear instructions for threading, bobbin setup, and basic stitching functions. This model, like others in the series, has become a staple in many sewing rooms, offering a timeless blend of functionality and durability that continues to inspire sewists today.
Contents of the Singer 66 Manual
The Singer 66 manual provides comprehensive guidance, including threading instructions, maintenance tips, troubleshooting common issues, and using attachments. It also covers basic stitching functions and safety precautions, ensuring users can operate and care for their machine effectively.
Welcome to the Singer 66 sewing machine manual! This section provides an essential introduction to the machine and outlines critical safety precautions to ensure safe and effective use. The manual begins by familiarizing users with the machine’s components and their functions, helping beginners understand the basics before starting their first project.
- Always read the manual thoroughly before operating the machine to avoid accidents.
- Keep children and pets away while sewing to prevent unintended injuries or damage.
- Ensure the machine is placed on a stable, flat surface to maintain balance during operation.
- Avoid sewing near flammable materials or in areas with poor ventilation.
- Never touch moving parts with your fingers or other objects while the machine is in use.
- Use only Singer-approved attachments and accessories to maintain safety and performance.
The manual also emphasizes the importance of mental preparation and organization before sewing. Users are encouraged to plan their projects, gather all necessary materials, and ensure a distraction-free workspace. By following these guidelines, sewists can enjoy a safe and rewarding experience with their Singer 66 machine.
5.2 Threading the Machine
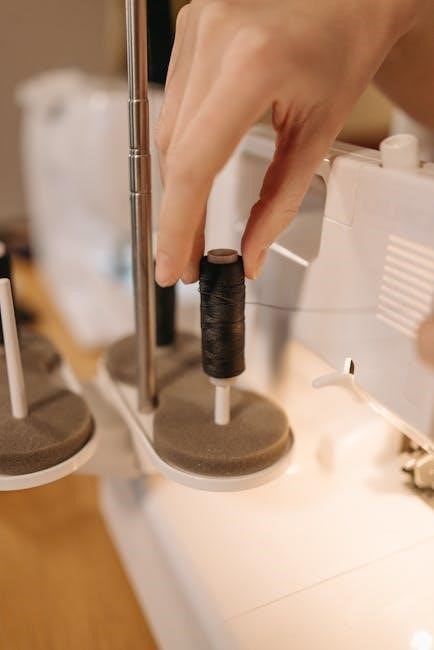
Threading the Singer 66 sewing machine is a straightforward process that ensures smooth stitching and optimal performance. The manual provides clear, step-by-step instructions to guide users through this essential task. Begin by placing the spool of thread on the spool pin, ensuring it rotates smoothly. Next, guide the thread through the upper tension discs, making sure it clicks into place. From there, pass the thread through the take-up lever and finally through the needle. The manual emphasizes the importance of maintaining the correct thread tension to prevent fabric puckering or loose stitches.
- Always use high-quality thread suitable for your fabric type.
- Keep the thread taut but not overly tight to avoid breaking.
- Trim excess thread close to the fabric after sewing.
Proper threading is crucial for achieving professional results. The Singer 66 manual also includes illustrations to help visualize the process, making it easier for beginners to follow. By adhering to these guidelines, users can ensure their machine operates efficiently and produces consistent stitches. Regularly checking and adjusting the thread tension will also extend the machine’s lifespan and maintain its performance.
5.3 Maintenance and Care
Regular maintenance is essential to ensure the Singer 66 sewing machine operates smoothly and lasts for years. The manual emphasizes the importance of cleaning the machine thoroughly after each use to remove lint, dust, and thread fragments. Use a soft, dry cloth to wipe down the exterior and internal components, paying special attention to the bobbin area and tension discs. Oiling is another critical step; apply a few drops of high-quality sewing machine oil to the moving parts, such as the handwheel and gears, to keep them lubricated and running effortlessly.
- Clean the machine after every use to prevent dust buildup.
- Use the recommended oil to avoid damaging the internal mechanisms.
- Check for loose screws or parts and tighten them as needed.
- Store the machine in a dry, cool place to protect it from rust and moisture.
By following these maintenance tips, you can preserve the performance and extend the lifespan of your Singer 66. Regular care ensures that the machine remains reliable and continues to deliver precise stitching for all your sewing projects. Always refer to the manual for specific guidance on maintenance procedures. Proper upkeep will keep your Singer 66 in excellent condition for generations to come.
5.4 Troubleshooting Common Issues
The Singer 66 manual provides detailed solutions for common issues that may arise during use. One of the most frequent problems is uneven stitching, often caused by incorrect thread tension. To resolve this, adjust the tension discs and ensure the bobbin is properly seated. If the machine fails to sew, check for a jammed bobbin or tangled threads. Regularly cleaning the machine and oiling the moving parts can prevent such issues.
- Thread Breakage: Check for loose connections or improper threading. Ensure the needle is correctly inserted and the bobbin is threaded properly.
- Machine Not Turning On: Verify that the machine is correctly plugged in and the power switch is functioning. For treadle models, ensure the belt is securely attached.
- Skipping Stitches: Inspect the needle for damage or dullness. Replace the needle if necessary and ensure it is suitable for the fabric being used.
By addressing these common issues promptly, you can ensure uninterrupted sewing sessions. Always refer to the manual for specific troubleshooting steps tailored to the Singer 66 model. Regular maintenance and proper care will minimize the occurrence of these problems, keeping your machine in optimal working condition.
5.5 Using Attachments and Accessories
The Singer 66 manual emphasizes the importance of using attachments and accessories to enhance sewing capabilities. These tools allow for specialized stitching, such as zippers, buttonholes, and hemming. The back-clamping foot, for instance, is ideal for heavy fabrics, while the zipper foot ensures precise seam alignment. Hemming feet are designed for clean, professional finishes on edges.
- Attachment Installation: The manual provides step-by-step instructions for securely fitting attachments to the machine. Proper alignment ensures smooth operation and prevents damage.
- Accessory Usage: Accessories like extra bobbins, needles, and tension discs are essential for maintaining performance. Regularly check and replace worn parts to avoid sewing interruptions.
- Storage Tips: Store attachments in a protective case to prevent damage. This ensures they remain in good condition for future use.
By utilizing the right attachments and accessories, sewists can achieve professional results and expand their creative possibilities. Always refer to the Singer 66 manual for specific guidance on compatible tools and their applications. Proper use of these accessories will enhance your sewing experience and extend the machine’s longevity.
How to Use the Singer 66
Using the Singer 66 involves setting up the machine, threading, and bobbin installation. The manual guides users through basic stitching, adjusting stitch length, and utilizing attachments for specialized tasks. Proper setup ensures smooth operation and professional results.
6.1 Setting Up the Machine
Setting up the Singer 66 sewing machine begins with carefully unpacking and positioning it on a sturdy table or treadle base. Ensure the machine is level and stable to prevent vibration during use. For treadle models, attach the treadle iron and adjust its alignment for smooth operation. If using a motor, connect it according to the manual’s instructions, ensuring proper alignment with the machine’s handwheel.
Next, familiarize yourself with the machine’s components, such as the stitch length regulator, tension dials, and bobbin winder. Refer to the manual for specific setup steps, as slight variations exist between models like the 66-1, 66-16, and 66-18. Ensure all parts are clean and well-lubricated before first use. Finally, test the machine by sewing a scrap piece of fabric to confirm proper function and make any necessary adjustments.
6.2 Threading and Bobbin Setup
Threading the Singer 66 sewing machine requires attention to detail to ensure smooth operation. Begin by winding the bobbin with the desired thread, keeping the bobbin winder aligned with the machine’s spindle. Once wound, insert the bobbin into the bobbin case, ensuring it clicks securely into place. For the upper thread, guide the thread through the tension discs, then through the take-up lever, and finally through the needle. Refer to the manual for specific threading paths, as slight variations exist between models like the 66-1, 66-16, and 66-18.
After threading, gently pull the thread to ensure proper tension. Test the machine by sewing a few stitches on scrap fabric to check for even stitching and thread flow. If issues arise, such as thread breaking or uneven stitches, adjust the tension dials or consult the manual for troubleshooting tips. Proper threading and bobbin setup are crucial for optimal performance and stitch quality.

6.3 Basic Stitching and Functions
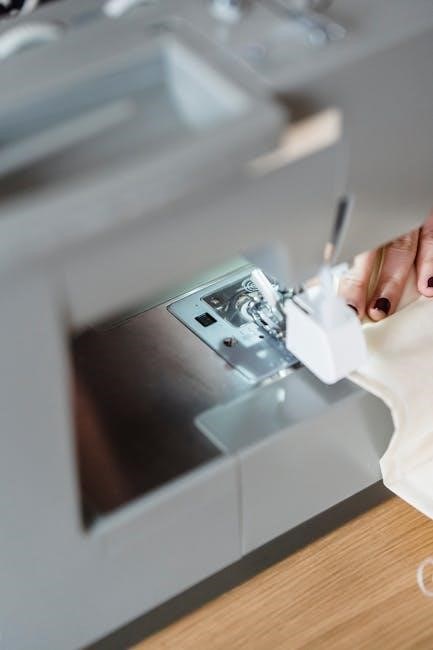
The Singer 66 sewing machine is designed for straightforward operation, making it ideal for both beginners and experienced sewists. The machine primarily offers a straight-stitch function, which is perfect for general sewing tasks such as repairing garments, sewing straight seams, and crafting home decor items. To begin stitching, ensure the machine is properly threaded and the bobbin is correctly set. Place your fabric under the presser foot, aligning the edge with the machine’s guide.
Engage the handwheel or treadle to start sewing, maintaining steady control over the fabric’s movement. The stitch length can be adjusted using the stitch length knob, allowing for customization based on fabric type and seam requirements. For reverse stitching, pull the reverse lever to secure the beginning of your seam. The Singer 66 also features a feed dog mechanism that helps move fabric evenly, ensuring consistent stitching.
While the Singer 66 is not a zig-zag machine, its simplicity and reliability make it a timeless choice for basic sewing needs. Always refer to the manual for guidance on using attachments or exploring additional functions tailored to your projects.
Maintenance and Care Tips
Regular cleaning and oiling are essential to maintain the Singer 66’s performance. Use a soft brush to remove lint and debris, and apply sewing machine oil to moving parts. Refer to the manual for specific lubrication points and schedules to ensure longevity and smooth operation.
7.1 Cleaning the Machine
Cleaning the Singer 66 sewing machine is a straightforward process that ensures optimal performance and longevity. Start by turning off and unplugging the machine to avoid any accidental start-ups. Remove the needle and presser foot to access the areas beneath. Use a soft-bristled brush or a small vacuum cleaner to gently sweep away lint, thread fragments, and debris from the bobbin area, feed dogs, and tension discs. Avoid using harsh chemicals or liquids, as they may damage the machine’s finish or harm internal components. For stubborn lint, a dry cotton swab can be used to wipe down tight spaces. After cleaning, inspect the machine for any remaining dust or debris. Regular cleaning prevents clogs and ensures smooth stitching. For heavy-duty cleaning, refer to the manual or use compressed air specifically designed for electronics, holding the can upright to avoid spraying liquids. Cleaning should be done after every major project or at least once a month, depending on usage. This simple maintenance routine keeps the Singer 66 running efficiently and reliably.
7.2 Oiling and Lubrication
Regular oiling and lubrication are essential to maintain the smooth operation of the Singer 66 sewing machine. Turn off and unplug the machine before starting. Use only high-quality sewing machine oil, as specified in the manual, to avoid damaging the internal components. Locate the oiling points, typically found near the handwheel, gears, and shuttle hook. Apply a few drops of oil to each point, ensuring coverage without over-lubricating, as excess oil can attract lint and dust. Gently turn the handwheel to distribute the oil evenly throughout the mechanism. Use a clean, dry cloth to wipe away any excess oil that seeps out. Repeat this process every 10 hours of use or as recommended in the manual. Proper lubrication prevents friction, reduces wear on moving parts, and ensures the machine runs quietly and efficiently. Consistent oiling also helps maintain the machine’s longevity and performance, keeping it in excellent working condition for years to come.
7.3 Common Issues and Solutions
The Singer 66 sewing machine, like any mechanical device, may encounter occasional issues. One common problem is thread bunching or uneven stitching, often caused by incorrect thread tension. To resolve this, refer to the manual’s threading guide and adjust the tension discs and spring. Another issue is jamming, which can occur due to lint buildup or incorrect needle placement. Regular cleaning and ensuring the needle is properly aligned can prevent this. If the machine is noisy or operates sluggishly, insufficient lubrication may be the cause. Apply a few drops of sewing machine oil to the recommended points and gently turn the handwheel to distribute it evenly. Additionally, using the wrong needle size or type can lead to poor stitch quality. Always use needles designed for the Singer 66 and suitable for your fabric type. For persistent problems, consult the troubleshooting section in the manual or seek professional assistance. Addressing these issues promptly ensures optimal performance and extends the machine’s lifespan.
Restoration and DIY Projects
Restoring a Singer 66 sewing machine can be a rewarding DIY project, bringing new life to a vintage machine. Many enthusiasts enjoy disassembling, cleaning, and refinishing these models to restore their original charm. Common projects include repainting the body, refinishing the wooden cabinet, and reupholstering the treadle. Owners often share tutorials and tips online, such as how to remove rust, polish chrome parts, and replace worn-out components. Some even add custom decals or decorative touches for a personalized look. For those new to restoration, step-by-step guides and video tutorials are available, covering everything from basic cleaning to advanced mechanical overhauls. DIY projects like these not only preserve the machine’s functionality but also highlight its historical significance. Whether you’re aiming for a factory-fresh appearance or a unique, artistic makeover, restoring a Singer 66 is a fun and creative way to connect with sewing history.
Accessories and Compatible Parts
The Singer 66 sewing machine is supported by a wide range of accessories and compatible parts, ensuring optimal performance and versatility. Original attachments, such as the back-clamping foot, zipper foot, and gathering foot, are designed to enhance stitching capabilities for various fabrics and projects. The machine’s manual provides detailed instructions on using these attachments effectively. Additionally, maintenance parts like oil cans, bobbin cases, and tension discs are readily available, both as vintage originals and modern reproductions. Enthusiasts often source these from Singer’s official catalog or specialty sewing stores. Compatible parts, such as needles and belts, are also widely accessible, ensuring the machine remains functional for years. For those restoring or upgrading their Singer 66, online marketplaces and sewing communities offer a wealth of resources. Whether you’re replacing worn components or expanding your sewing options, the Singer 66’s ecosystem of accessories and parts makes it a timeless and adaptable sewing companion.